Reading · a photograph
The break in the storm
A worked example. We take one mountain photo, read it carefully before any editing, and walk through the different ways it could be finished.
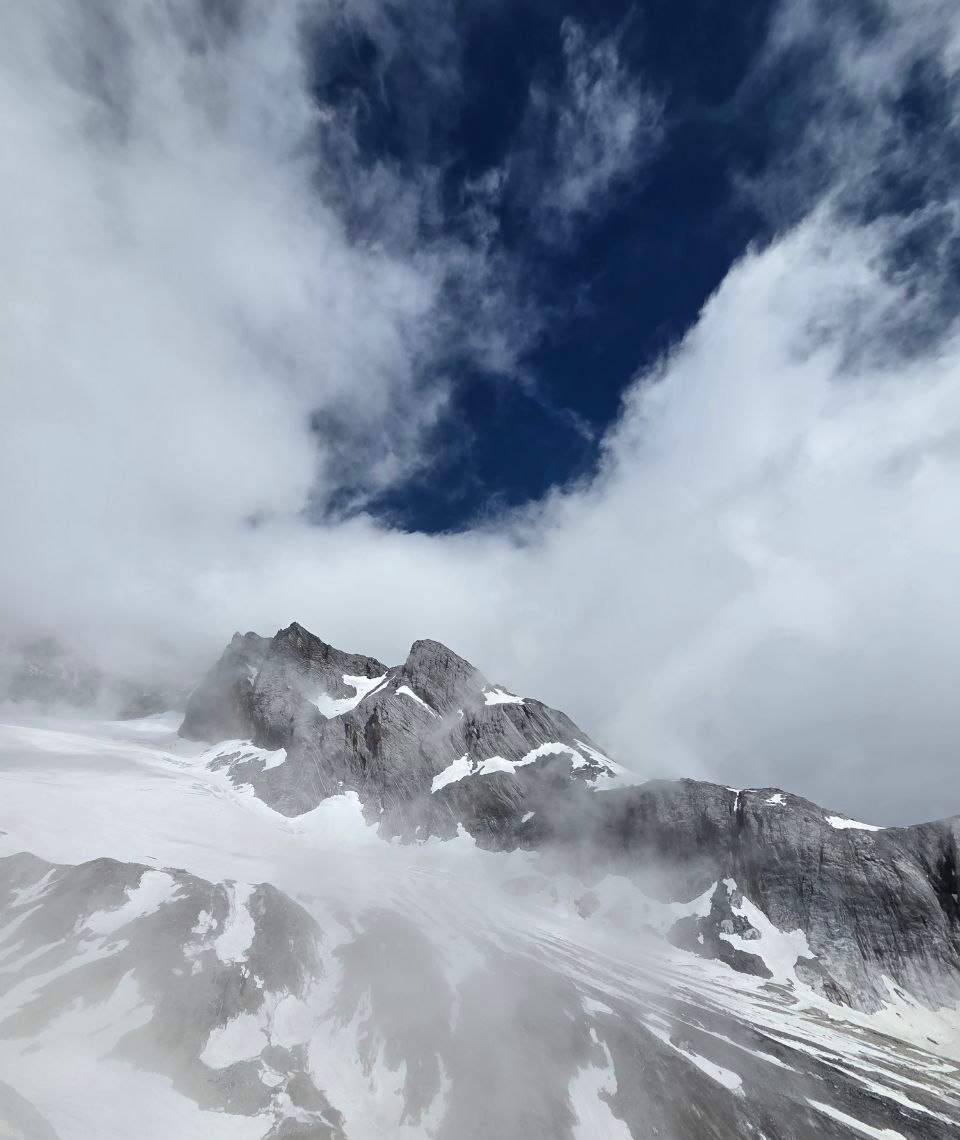
Most people open a photo and start moving sliders to see what happens. It gets there eventually, but it is slow, and half the time you cannot say why you stopped where you did. There is a better first move, and it costs nothing. Before you change a thing, look at the picture and work out what it actually is. Where is the light coming from? What is it doing to the scene? What does your eye go to first? Answer those and most of the edit follows on its own, because now you are working toward something. Here is that reading on one photo, in four questions.
What is it of?
A rock and snow summit going in and out of cloud, with a patch of hard blue sky torn open above it. The camera is up at the weather line, looking across at the peak rather than up at it. This step sounds too obvious to bother with, but it is worth putting in one plain sentence, because every later choice has to fit it. If a version of this photo stops being about a mountain in cloud, something has gone wrong.
What is the light doing?
Midday light at altitude: hard, plenty of it, coming down from almost overhead. There is not much air up here to scatter it, so the sky reads as a deep blue and the sunlit cloud goes almost white. Across the snow there is barely a shadow. Across the dark rock there is, and the jump from bright snow to near-black stone is where most of the contrast in the frame sits. A lot of your decisions come back to how far you want to push that jump.
Spend the most time on this question. Nothing else in the picture tells you what time of day it was, or what it felt like to be standing there. The light does. Change the picture without watching what the light is doing and you can end up with a clean, competent edit of a scene that no longer matches the day you shot.
Where does the eye go now?
Straight to the gap in the cloud. It is the darkest, most saturated shape up top, and the bright cloud around it works like a frame, so that is where you look first. From there the eye drops to the wide band of pale snow along the bottom. The trouble is that the peak, which is the actual subject, sits between those two and is quieter than either. So the picture is pulling attention slightly away from its own subject. That is useful to know, because it tells you what the edit has to do here: settle the sky and the foreground enough that the peak can hold its own.
Is the frame right?
Worth asking on every photo, and worth being willing to answer no. There is a lot of plain snow across the bottom and a lot of sky, and the peak sits low in the frame. You can leave it, since the empty space is part of how big and cold the place reads. Or you can crop down toward the ridge and the cloud coming off it, and the photo turns into a portrait of the mountain instead of the weather around it. Both work. Just remember that what you crop out of a frame changes it more than almost anything you can do to what stays in.
Notice that none of that has told you what to do yet. That is deliberate. The light really is hard and overhead, the eye really does go to the blue, the frame really is a little loose, and two people reading the photo well would mostly agree on all three. What you do next is the part that becomes yours, and there is more than one good answer. Here are two.
01 Keep it close to what the camera got
The camera caught a good moment: the cloud breaking open over the summit for a few seconds. One reasonable finish is to more or less keep it. Make sure the brightest cloud and the darkest rock still have detail in them, take down anything that distracts, and otherwise leave it be. The blue stays strong, the cloud stays bright, the peak stays dark between them. It is the boldest of the versions, and with light like this, bold is fair to the scene. There is nothing lazy about stopping early when the picture is already working.
02 Cool it down
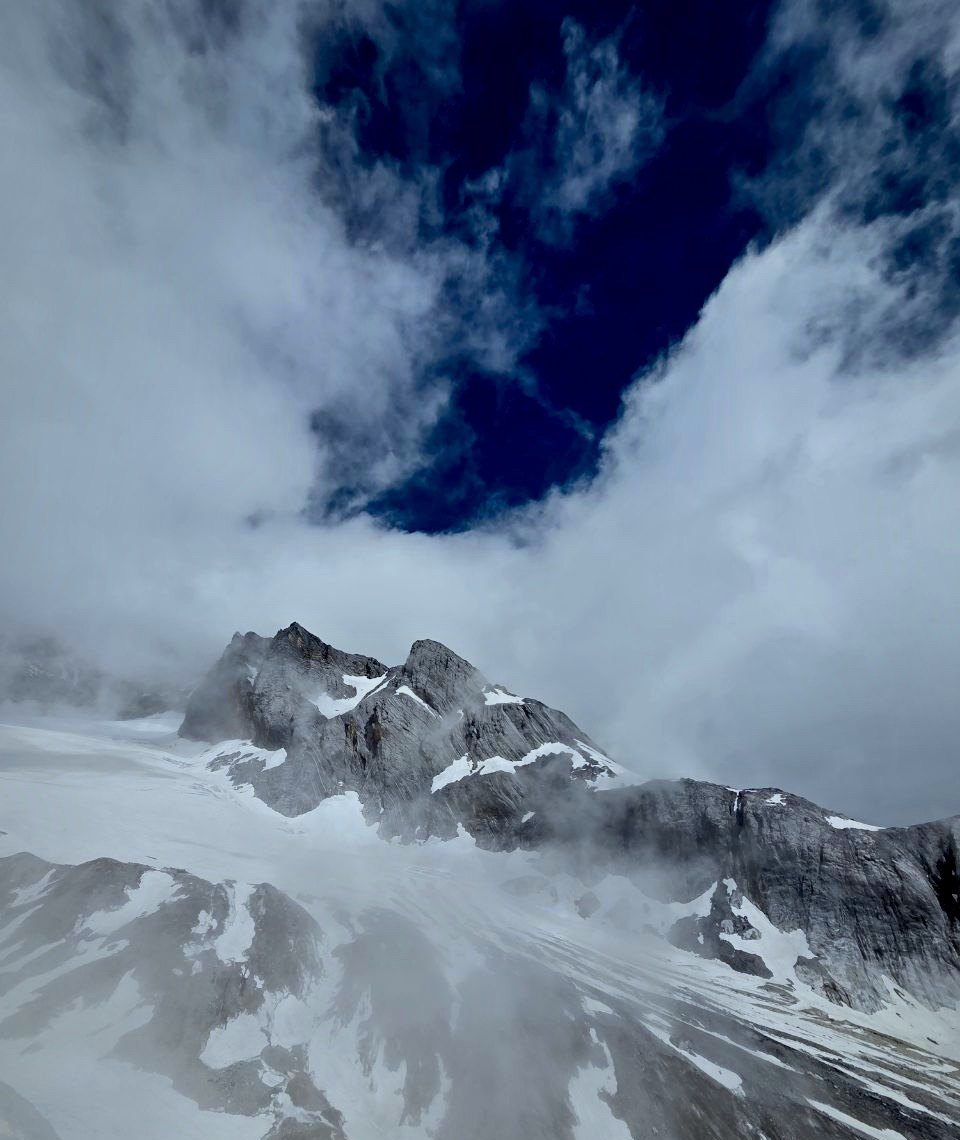
Or you take the view that the bright blue oversells it. It was cold up there and the mountain was vanishing into cloud, and a punchy blue sky works against both of those. So you pull the whole picture cooler and quieter until the sky stops grabbing your eye and the peak settles into the weather rather than standing under a spotlight. You have not added or removed anything. It is the same photo in a lower key, and for this scene it may be the better of the two.
03 The crop we did not show
There is a third version, and you can probably picture it already. Crop in hard on the ridge and the cloud peeling off it, drop most of the sky and most of the foreground, and let the mountain fill the frame. Now it is about the summit itself, not the break in the weather. Same file, a very different photo. The crop is the option people skip most often, and it is frequently the strongest one on the table.
This is the part Loupe is built around. The assistant reads the photo with you in plain language, then works the same controls you can see on screen, so every change is one you could have made by hand and can undo. Ask it, and it will show you the bold version, the cool version, and the tight crop, and tell you what each one is doing and why. What it will not do is paint in a sky you never photographed, or decide for you which of these is right. You took the picture. That call is yours.